Sunday, October 24, 2010

Best Pumpkin Pie EVER. Period. The End.

YUMMMMMY!
Photo courtesy of foodnetwork.com
My best friend, Angie, called me today looking for a pumpkin pie/pumpkin cheesecake recipe to take to a dinner she was going to tonight.  I was happy to instantly have a fantastic recipe to share with her.  I wish I could take credit for this amazing deliciousness, but is owed entirely to Paula Dean.

I've made this for Thanksgiving and other fall festivities for the past few years, and everyone loves it.  Even people who say they don't like pumpkin pie.  A couple of notes about the recipe - this makes a ton of filling, and I've found it's more than enough to fill my pie dish. I like to take the extra, and put it into buttered ramekins to bake up little individual "pumpkin cheesecake soufflés."  Also, the recommended cook time is not accurate - it actually takes much longer.  Just keep baking until  a toothpick comes out clean from the center of the pie.  I wish I had a correct cook time to share, but I've never actually tracked it, I just know it takes longer than the recipe says it does.  If your crust starts to get too brown while you're waiting for the pie to finish, just crimp some aluminum foil around the crust and you should be fine.  Lastly, the recipe says "optional" to the ground ginger, but I think that the ginger adds a delicious and slightly unexpected flavor note, so don't skip it!

So, Angie, what did you think???

Paula Dean's Pumpkin Pie
Ingredients

  • 1 (8-ounce) package cream cheese, softened
  • 2 cups canned pumpkin, mashed
  • 1 cup sugar
  • 1/4 teaspoon salt
  • 1 egg plus 2 egg yolks, slightly beaten
  • 1 cup half-and-half
  • 1/4 cup (1/2 stick) melted butter
  • 1 teaspoon vanilla extract
  • 1/2 teaspoon ground cinnamon
  • 1/4 teaspoon ground ginger, optional
  • 1 piece pre-made pie dough
  • Whipped cream, for topping

Directions

Preheat the oven to 350 degrees F.
Place 1 piece of pre-made pie dough down into a (9-inch) pie pan and press down along the bottom and all sides. Pinch and crimp the edges together to make a pretty pattern. Put the pie shell back into the freezer for 1 hour to firm up. Fit a piece of aluminum foil to cover the inside of the shell completely. Fill the shell up to the edges with pie weights or dried beans (about 2 pounds) and place it in the oven. Bake for 10 minutes, remove the foil and pie weights and bake for another 10 minutes or until the crust is dried out and beginning to color.
For the filling, in a large mixing bowl, beat the cream cheese with a hand mixer. Add the pumpkin and beat until combined. Add the sugar and salt, and beat until combined. Add the eggs mixed with the yolks, half-and-half, and melted butter, and beat until combined. Finally, add the vanilla, cinnamon, and ginger, if using, and beat until incorporated.
Pour the filling into the warm prepared pie crust and bake for 50 minutes, or until the center is set. Place the pie on a wire rack and cool to room temperature. Cut into slices and top each piece with a generous amount of whipped cream

Great Grandma Nina's Oven Barbecued Chicken

Dinner is served.  Not fancy, but tasty!
As the title implies, this recipe has been in my family for a very long time.  Nina was my Grandfather's Step-Mother, and although I know very little about her, I think i would like her, because this is one tasty chicken dish!

Coming from a very frugal, blue-collar background, Nina knew how to make a little go a long way, and this is a very budget friendly recipe.  A whole chicken cut up shouldn't run you more that $7, and you get a generous helping of chicken for this dinner, and then you have the bones and other goodies leftover that you can make chicken stock with. Additionally, most of the sauce ingredients can be found in your fridge and pantry already, so no need for an extra shop.

I didn't have any ketchup today (I have about a bajillion condiments, but was actually out of ketchup!) So I made my own jazzed up version to use in this dish.  If you're interested in the recipe for my 'ketchup' - click here, but note that if you use this 'ketchup', you don't need to use any of the sauce ingredients for Nina's recipe, as they are all incorporated into my recipe.  Just use my 'ketchup' over the par-roasted chicken & onions, and then follow Nina's cooking method. You won't need all of it, just use enough to cover the chicken and create a shallow bath for it to cook in.

So without further ado - here is Nina's recipe!

Ingredients:
1 whole chicken, cut up (you don't have to do the cutting, you should be able to find this in your grocery store all ready to go!)
1/3 cup apple cider vinegar
1 large sweet onion, cut into slices
1 tsp rosemary
2/3 cup ketchup
2 bay leaves
1 tsp salt
4 T butter (sometimes I omit or halve this - it adds richness to the sauce and helps to brown the skin)
1/4 tsp dry mustard.

Directions:
Briefly browned, top with
onion, and ready for sauce!
Sauced & Ready to Go.
Bake me!!
Preheat oven to 350 degrees. Sprinkle the chicken with some S&P, and place skin side down in a single layer in a greased glass baking dish, and cook for 15 minutes, or just until the skin starts to brown.  Remove, turn chicken skin side up, and top with the sliced onions.  In a saucepan, combine the remaining ingredients. Mix well and bring to a rolling boil.  Let cook for about 5 minutes.  Remove from heat, and pour over the chicken.  Cook for 30 minutes, and then turn the chicken over so it's skin side down.  Cook for another 30 minutes.  Turn the chicken skin side up, and baste the chicken (just spoon the sauce over the top of the chicken). Put it under the broiler and cook, basting frequently, until the top is nice and browned & crispy.  Serve with some of the sauce and cooked onions spooned on top.  I like this with a side of stuffing (secret cheat... stovetop is tasty) and a green salad. Also good with rice pilaf and steamed green beans.

Enjoy!

Molly's Homemade ZESTY ketchup/bbq sauce

Tonight I was following a recipe that called for ketchup, but I was out, so I made this.  You might want to try it too - a nice change from traditional ketchup - and full of zip & zing.

Ingredients:
1 large (29 oz) can of tomato sauce
1/2 cup apple cider vinegar
1/2 cup apple cider
1/3 cup dark brown sugar
1/2 bottle of beer
7 cloves garlic, minced
1 red onion, diced
3 bay leaves
1 tsp Rosemary
1 T paprika
1 tsp chili powder
1/2 tsp dry mustard
1/2 tsp cayenne
Few dashes of Worcestershire sauce (I always use Lee & Perrins)
Few dashes of reduced sodium soy sauce
Few dashes hot sauce of your choice
S&P

Directions:
Combine all ingredients in a sauce pan, and mix well.  Bring to a rolling boil and cook for 10 minutes.  Remove and discard bay leaves, then purée the mixture with an immersion blender until smooth (NEVER BLEND A HOT LIQUID IN A TRADITIONAL BLENDER). Put back on the heat, and let simmer over medium low heat until it reduces to your desired consistency. Let cool, and serve as you would regular ketchup, or use to baste meat like a bbq sauce.

This won't ever ben the consistency of store bought ketchup, but it's still good!

Sunday, October 17, 2010

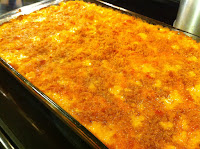
Molly's Macaroni & Cheese

Cheesy deliciousness 
Generally, my hubby is a very adventurous eater. However, he is a big kid at heart and some of his favorite foods come straight off the kid's menu - chicken fingers, pasta with parmesan, pepperoni pizza, etc. etc.  He has a huge anatomy test on Friday, and has spent this entire gorgeous fall day at the school library studying even when he'd much rather be on the golf course.  So, to surprise him and to fill his tummy with some comfort & love, I decided to make him Macaroni and Cheese (albeit, a more grown up version), which he adores. Side note, when studying anatomy for hours on end, a dish with meat isn't always the most appetizing, another plus for mac & cheese! Here's the recipe.

Ingredients:
  • 1 smallish red onion, finely chopped
  • 2 garlic cloves, minced
  • 1/4 cup chopped roasted red pepper
  • 4 cups milk
  • 6 parsley stems (leafy part removed)
  • 1 bay leaf
  • 1/2 tsp nutmeg
  • 1/2 tsp dried mustard
  • 1/2 tsp cayenne
  • 6 shakes of hot sauce (I like Frank's red hot)
  • S&P
  • 4 T, plus 2 T, plus 2 T Butter
  • 4 T Flour
  • 4 T bread crumbs (I like Panko style the best)
  • 3 cups Shredded Sharp Cheddar Cheese
  • 1 cup Shredded Medium Cheddar Cheese
  • 1 cup shredded Parmesan Cheese
  • 1 lb elbow macaroni
Directions:
Preheat oven to 350 degrees.

In a small saucepan, combine the milk, parsley stems, bay leaf, and some black pepper.  Turn to medium high heat and bring to a rolling boil, then reduce heat to low and let simmer until ready to use.
Milk Mixture

While the milk is simmering, in a small skillet, sauté the onion in 2 T butter  and some S&P over medium low heat for 10 minutes.  Turn the temperature to low, and add the minced garlic to the onions.  Continue to cook until the onions are caramelized and reduced, approximately another ten minutes.

Caramelized Onions & Garlic
Now you're ready to make your roux.  A roux (pronounced 'roo') is a cooked mixture of flour and butter.  It is a thickening agent used to make sauces, as well as thicken gravy, soups, and stews.  Roux is something you might not get right on the first try - but that's okay!  Start off with just a little bit of flour and butter, and if it doesn't work out, you're not facing a major loss. New to this blog - I have added a movie along with some pictures to explain just how this works.  Click here to learn how to make a roux, and watch the first part of the movie.  For this roux, use 4 T butter and 4 T flour.

Once your roux is cooked, it's time to make it into a béchamel sauce.  Oh no!  Another fancy cooking term and complicated process!!  Well, not really.  Same as roux, once you've made one béchamel sauce, you'll find that it really isn't too tricky, and it is such a wonderful sauce to have in your repertoire as there are so many things you can do with it!  I also did a video on making a béchamel.  Click here to learn how to make it, and watch the end part of the movie. For this béchamel, use the seasoned milk mixture from above with the bay leaf and parsley stems removed, and add to the roux you just made.
Cheesy Sauce!

In a pasta pot, bring water to a boil and start to cook your macaroni noodles.

Once the béchamel is made, it's time to season it up.  First, turn the temperature to low/medium-low. Add the nutmeg, dried mustard, cayenne, hot sauce, and some more S&P. Stir well. Now add the caramelized onion/garlic, roasted red pepper, and all of the cheese.  Stir well and let it cook until the cheese is completely melted.

Ready to bake
When the macaroni noodles are cooked, drain them well and then add them back into the pot.  Pour your cheese mixture over the top, and mix well.  Grease a large glass baking dish, and pour the mac & cheese into the dish.  Set aside.

EAT ME NOW.
In a small saucepan, take the last 2 T of butter and melt it.  Remove from heat, and add the breadcrumbs and toss until they are all evenly coated.  Take this crumb topping and sprinkle over the top of your mac & cheese. Place the dish in the oven and bake until the breadcrumbs are golden brown and the mac & cheese is bubbling, approximately 30 minutes.  Remove from the oven, and let cool for 10 minutes or so.   The hubby and I like our mac & cheese with a squirt of ketchup on the side.  Enjoy!

Roux & Béchamel Sauce 101

Roux & Béchamel go hand in hand. A roux is such a versatile technique/recipe component to put into your repertoire, and a classic béchamel, which you can't make without a roux, has so many uses!    Just to clear things up, here are the technical definitions for these terms, brought to you by dictionary.com:

Roux: 
–noun
a cooked mixture of butter or other fat and flour used to thickensauces, soups, etc.

Béchamel:
–noun
a white sauce, sometimes seasoned with onion and nutmeg. Also called bechamel sauce .

As a rule of thumb, roux is normally a 1-1 ratio of butter & flour.  To start your roux you need to:
1.  Melt the butter


2. Add the flour


3. Whisk to combine.


Now check out the rest in the video!  The first part covers making the roux, and the second part takes the roux and turns it into a béchamel. PS - I have the worst camera skills... it's hard to cook and take a movie at the same time, so I apologize in advance for the shakiness.  Oh and don't even get me started on the edits!


To see these components put into a dish, check out my mac & cheese recipe here.

Was this helpful?  Were the explanations good & thorough enough for you to feel comfortable trying to make these things?  Your feedback is much appreciated!

Guest Post! Alex's New Orleans Style Tuna Steaks & Sides

Yummo! I can't wait to try this!
One of the best things for me about the hubby starting medical school, is the wives/significant others of his fellow students that I have gotten to know - such a diverse group of amazing women (and some dudes) from all around the country, with all different experiences.  One of my newest partners in crime is the lovely Alex Z.

Alex and her hubby hail from New Orleans, and needless to say, they know food!  Alex has already taught me so much about New Orleans culture and food, added a delicious & zippy seasoning salt to my pantry, and opened my eyes to the wonderful world of Mardi Gras parties... so when she told me what she was whipping up for dinner tonight, I asked her to share so I could share with all of you.

This is one talented chica and not only does she make beautiful meals, she is also a jewelry designer who makes really incredible jewelry (I proudly sport a gorgy pearl bracelet with anchor charm that she custom designed for me!).  I am so happy to count Alex as one of my new friends, and I can't wait for all of the adventures we will share during this bumpy med school road. So without further ado - here's Alex's Sunday night dinner!

A note from Alex:
What a gorgeous couple!
Remember, we are from New Orleans and we like our stuff spicy!  For those who don't like or can't handle the heat, they may want to consider using other seasonings or only making part of this dish.  As a suggestion for dessert, bread pudding goes well.  
Enjoy!

TUNA STEAKS
What you need:
- tuna steaks
- Paul Prudhome's Seafood Magic (or your favorite seasoning)
- salt
- butter and/or olive oil

What you do:
- Wash and dry the steaks
- when dry, season the steaks with Seafood Magic and salt
- in a skillet with a little butter and/or olive oil, cook tuna to you liking

RED HOT MASHED POTATOES
What you need
- Red potatoes
- Zatarain's Crab boil
- salt
- milk
- butter

What you do:
Boil the potatoes
When potatoes are almost finished, put the crab boil bag into the pot with them.  (the longer the bag is in the pot, the spicier the potatoes will be, so if you aren't used to spice be careful!  I leave it in there for about 15-20 mins)
when potatoes are finished, drain, mash and use salt, butter and milk to your liking

CORN MAQUE CHOUX
What you need:
- can of corn 
- can of creamed corn
- tomato
- 1/2 green pepper
- 1/4 white onion
- Tony Chachere's Seasoning 
* Feel free to use more or less of the vegetables, but that is usually enough for me

What you do:
- chop the tomato, onion and green pepper
- drain the can of corn
- in an extra large pan or a pot mix all of the ingredients, except the seasonings, over medium heat
- when the mixture has cooked, add Tony's to taste
* sometimes, the tomatoes make the dish soupy, use some corn starch to correct that if necessary.

STEAMED GREEN BEANS
- that one is pretty self explanatory lol!

My Dad's Quick Apple Cake

My Dad & his girls.
From left to right: Riley, Olivia, Me!
Growing up with a stay-at-home Mom who's a professionally trained chef, my Dad rarely got a chance in the kitchen.  If left to his own devices, he can broil a mean Stouffer's french bread pizza, and makes a pretty good burger, but his truly creative ventures in the kitchen were pretty limited.  Two things he's known for in our family are his "Black Beans & Rice" as well as this Quick Apple Cake. When I was a kid, we lived in an awesome neighborhood that had lots of get togethers.  For pot lucks, my Dad would make this recipe, and it was always greatly enjoyed by everyone

I would say that my Dad is a foodie (although he just barely makes the cut since he would actually prefer PB&J over Lobster, which I do NOT understand).... he has an amazing palate and definitely knows and appreciates great food. This is sentimental, but true (so don't gag yourself with your wooden cooking spoon)... he's the best Dad a girl could hope for, so even if he couldn't cook worth a lick, I'd still love him. Here's his Apple Cake recipe, which I changed just a tiny bit - I made it last night and it's just delish.  The hubby and our dinner guests loved it too.  Tastes great with a scoop of vanilla ice cream or a dollop of fresh whipped cream.

Slice of Autumnal Apple Amazingness!
Ingredients:
  • 1.5 stick  plus 1 T unsalted butter
  • 3 large Granny Smith apples, peeled, cored, and cut into thin wedges
  • 1 tsp fresh lemon juice
  • 3/4 cup plus 1 T granulated sugar
  • 2 tsp cinnamon
  • 1/4 tsp nutmeg
  • 1/2 tsp salt
  • 1 tsp vanilla
  • 1 tsp baking powder
  • 1/4 cup milk
  • 1/4 cup fresh apple cider
  • 2 eggs lightly beaten
  • 1 1/4 cup all purpose flour
Directions:
Preheat oven to 350 degrees.  Butter a medium sized glass baking dish with the 1 T of butter.

Melt the remaining butter in a saucepan and cook over medium low heat until golden, (this gives it a nice nutty and rich flavor... as if butter weren't rich enough already!) about 10 minutes, and remove from heat to let it cool slightly, but not solidify.

While the butter is melting, toss the apple slices with lemon juice, 1 T sugar, cinnamon, and nutmeg.  Spread the apples in the baking dish.

In a mixing bowl, whisk together the flour, salt, and baking powder. Stir the remaining sugar into the melted butter, then whisk in the milk, cider, and vanilla. Whisk in the eggs and add the mixture to the dry ingredients.  Whisk thoroughly to make a smooth batter.  Pour evenly over the top of the apples (don't worry, it will seep into all the nooks and crannies) and sprinkle the top with some granulated sugar.

Bake for 30 minutes or until the top is golden brown & crispy.

Boeuf Bourguignon - aka Fancy Pants Beef Stew

Bon Appétit!
Anyone who has seen "Julie & Julia" knows the significance ascribed to this dish. It just might be my favorite stew recipe ever.  It sounds fancy (shout out to my friend Kelli, who's adorable kids have dubbed me "fancy cooking pants" - this post title is for you guys!) and takes a long time to cook, but it's actually not that complicated and it tastes simply A-mazing.  The wine makes the meat incredibly tender and flavorful, and all of the butter sautéed veggies and the tomato paste add an incredible richness, while the thyme creates a woodsy heartiness.  So many layers of flavor, so incredibly delicious!

This recipe is not Julia's recipe, but the recipe that my Mom and one of my Aunts have always made.  This particular Aunt has a very discerning French husband, and this dish receives his seal of approval! It would be very French to serve it with a toasted buttered baguette, but I like it over a big scoop of mashed potatoes, a la American.  The final French touch, is a condiment - put a dollop of dijon mustard on the side of your bowl to dip the meat into - really brings out the flavor.

This makes quite a bit of stew - I would say it easily serves 6 people, so  have people over, plan for some delish leftovers, or halve the recipe.  SO without further ado - Boeuf Bourguinon.  Bon Appétit!!

Ingredients:
  • 2 lbs stew beef, trimmed (if it's in really large chunks, cut it into more bite sized pieces)
  • 3/4 lb baby carrots, cut in half on the bias (aka diagonally)
  • 1/2 to 2/3 bottle of nice red wine (nothing sweet)
  • 2 cans reduced sodium beef broth
  • 16 oz white button mushrooms (2 packages) cut into thin slices.
  • 1 tsp dried thyme
  • 1/3 can tomato paste
  • 1 cup of frozen pearl onions
  • 1/2 cup frozen baby green peas
  • 2 whole bay leafs
  • 3 cloves garlic, mince
  • Worcestershire sauce
  • All purpose flour
  • S&P
  • Butter
  • Olive Oil
Directions:
In a large dutch oven* melt 3 T butter and 3 T EVOO over medium high heat.  Season your stew meat with a bit of S&P, and working in small batches, brown the meat but don't worry about cooking it through.  The reason you do this in small batches is so that the meat doesn't get too crowded and steam which leads to gray meat.  When you give the meat more room to cook, it browns up to a beautiful color.  Remove the batches as they complete, and sprinkle them with some flour. Toss to coat.  The flour helps to thicken the stew later on. Set aside.

In the same pot, add another 2 T of butter, and add the carrots. Season with a bit of S&P. Sauté them for about 2 minutes and then add 3 T of flour to the pot.  Turn the heat down to medium.  Stir constantly and keep scraping the bottom of the pot with a flat bottomed wooden spoon.  If the pot gets too dry, add some more butter. (This IS a French recipe, after all... so there's bound to be butter!!) Some of the flour will coat the bottom of the pot, that's okay, and it's okay to let it get to a nice brown color, but don't let it burn (aka turn really dark brown or black).  If it starts to brown too quickly, turn your heat down and take the pot off the heat for a moment. Continue to cook, stirring frequently, for another 3 minutes.

Take the bottle of wine and pour 1/2 to 2/3 of it into the pot.  This deglazes the pot, which means that the liquid releases all of the caramelized flavor goodness from the cooking process back into the dish. Scrape the bottom of the pot very well with your wooden spoon until all of the flour coating is loosened and incorporated into the stew.

Add your stew meat back into the pot.  Next, add the beef broth, tomato paste, garlic, thyme, and 3 shakes/dashes of Worcestershire sauce.  Stir well so that the tomato paste incorporates, then cover and simmer over low heat for 30 minutes.

As this point, the hard works is done!  While the stew is simmering, sauté your mushrooms.  Tips on the perfect sauteéd mushrooms are here.  I like to do these in butter with S&P and a sprinkle of dried thyme, I also like to cook them down over low heat for quite a bit of time so that they get really nicely browned and delicious.

After the 30 minutes have passed, add the pearl onions and simmer covered for another 30 minutes.

Have a glass of wine (not required, but recommended).

Finally, add the mushrooms and peas, and simmer uncovered for 20-30 minutes.  Taste to make sure your seasoning is right, adjust if necessary.  Serve and enjoy!!

* I use dutch ovens ALL the time, I couldn't live without them. If you don't have one yet, I highly recommend getting one - click here to view my favorite. The 5/12 quart size is ideal, and cobalt is super pretty.

Thursday, October 14, 2010

Inventing a New Thanksgiving Side Dish, Take 1

Close, but no cigar.
Thanksgiving is one of my favorite holidays, and the food that my family makes that day is something I look forward to all year. Seriously, all year (I will be sure to blog about that meal later on).  With the exception of a few people in the bunch, we're generally not much into sweets, so candied yams have never been all that popular, but they do make an appearance (something that green been casserole will NEVER do).

Today I was thinking about how I could take something like candied yams, and make it more to my liking, so I started to brainstorm.  I knew that if I was going to make anything sweet, I would want to have a savory component in the dish to counter that flavor note.  So, what I came up with was oven roasted sweet potatoes, goat cheese, and honeyed pecans with sage and crispy shallots.  They came out very pretty, and the hubby liked them, but I wasn't totally jazzed with the overall result.  Kind of reminded me of someone who's very attractive, but as you get to know them you find out they don't have much substance and aren't actually very enjoyable.

Whenever you make up a new recipe, you take the risk that it won't come out super well.  Don't be deterred!  Having a dish come out to an "ehh...." review isn't a bad thing.  There's nothing like room for improvement.  So, to all you aspiring home cooks, just keep chugging away!  You learn each time you cook - so take note of what you do: what you liked, what you didn't like, and improve it the next time around.

With that said, no recipe just yet. I'll work on this and hopefully have one to share, soon!

Tuesday, October 12, 2010

Beer Braised Chicken Stew with Baby Bellas & Fire Roasted Tomato

Now that's what I call stew!
I am in the midst of my full blown love affair with fall food, and tonight is the first night of the season that I made a nice slow cooked meal.  Stews are a wonderful way to make a big batch of food that's perfect for leftovers - in fact, oftentimes they taste even better the next day.

The one problem that I have with stews, is that too many people make pasty, ugly, grayish-brown stews.  Cornstarch thickeners, unidentifiable proteins & vegetables bits with gloppy sauce... no likey!  This is so easily avoided by using the right blend of veggies, and carefully cooking all of your ingredients in stages.  This might take a bit longer, but it is so worth it - each ingredient is cooked properly to bring out its best, and then added back in at the end. Below, you'll find a recipe that I made up tonight where the broth is a lovely orangeish-red brew of umami deliciousness, with tender chicken and a great blend of veggies who's flavors really sing.  I served it with toasted english muffins and a simply dressed green salad on the side.

Ingredients
  • 3 large boneless skinless chicken breasts, cut into stew size pieces
  • 8 baby bella mushrooms, sliced (each mushroom is slightly larger than a golf ball. If you can't find baby bellas, use your choice of mushroom - white button would be fine)
  • 2 carrots, peeled and sliced
  • 1 can fire roasted diced tomatoes
  • 1 large yellow onion, diced
  • 1 shallot, diced
  • 3 cloves garlic, minced
  • 6 parsley stems, leaves removed and set aside. 
  • 1 bottle of beer (I used Sam Adams Oktoberfest)
  • 1 32 oz box of reduced sodium chicken broth
  • Flour
  • Paprika
  • Dried Thyme
  • Ground Nutmeg
  • S&P
  • EVOO
  • Butter
Directions:  
In a large dutch oven, melt 2 T butter, and add enough EVOO to just cover the bottom of the pan.  Take your chicken pieces, and season with S&P and sprinkle with paprika, a bit of ground nutmeg, and 2 T of flour (the flour helps the broth thicken later on). Toss to coat.  Cook the pieces of chicken over medium high heat until golden, but not necessarily cooked through.  Make sure not to crowd the pan so that the meat browns and doesn't steam, so this will take a couple of batches.  Remove chicken, and set aside.

Add the sliced mushrooms to the pan and cook over medium heat until they release their liquid. Season with S&P, a generous sprinkle of dried thyme, and a small sprinkle of ground nutmeg.  Continue to cook until nicely browned and cooked down.  Remove, and set aside. 

If necessary, you can add a bit more EVOO & butter at this stage. Add your diced onion, season with S&P and cook over medium heat until completely translucent, and just starting to brown, approximately 5-7 minutes.  Add your shallots and garlic, and cook until translucent, approximately 3-5 minutes.  Add your sliced carrots.  Sauté over medium heat for another 5-7 minutes, stirring frequently.  

Add the beer, chicken broth, and the parsley stems. Scrape the bottom of the pan to release all of the caramelized cooking goodness.  Bring up to a low boil and then add the chicken and mushrooms back into the pot. Cook at a low boil for about 10 minutes so that the alcohol cooks out.  Remove the parsley stems, and add the can of tomato.  Turn temperature to low, cover, and cook for 20-30 minutes.  This is when all the flavors marry, and the beer does its job of tenderizing the chicken.  At this point, you can taste for seasoning and adjust if necessary. You can either serve now with a sprinkle of fresh chopped parsley on top, or continue to cook uncovered until it reduces to your liking.

What's your favorite kind of stew?

Friday, October 8, 2010

Roasted Butternut Squash Soup with Sage

Voila!
Technically speaking, fall has arrived in Washington, DC.... although you'd never know it walking around outside today.  Temperatures hovering around the mid 80's!  I simply love fall - the crispness of the air, halloween, thanksgiving, birthdays, my wedding anniversary, the colors of the changing leaves, and most of all, fall food!

Even though it doesn't feel like fall, the bounty of this lovely season has begun to show up in the market, and I couldn't resist the mounds of butternut squash in the produce section.  Squash is an awesome food - so many different types, and so many things you can do with it - mash it, roast it, stuff it, turn it into soup, add it to cakes and quick breads, etc. etc. etc.  I came up with this butternut squash soup recipe last year, and I hope you give it a try!  It's slightly time consuming because you have to wait for the squash to roast, but the active cook time is pretty quick and overall, it's a cinch.

Ingredients:

  • 1 large butternut squash - peeled, seeded, and cut into chunks.
  • 1 large sweet onion, diced
  • 1 heaping T dried, crumbled sage
  • 1/4 tsp ground nutmeg
  • 1/4 tsp cayenne (this provides the spice - but you can omit if you wish)
  • 1/4 tsp ground thyme
  • Scant 1/2 tsp curry powder
  • 1 32 oz. box Chicken Broth
  • 1 cup lowfat milk
  • 1 cup water
  • 3 T butter, diced, plus 1 T butter.
  • S&P
  • EVOO


Directions:
Above: Pre Roast.  Below: Post Roast.
See how the color intensifies?  That
means the flavors have, too!
Preheat your oven to 400 degrees.  Put your squash chunks into a large glass baking dish.  Drizzle with EVOO and sprinkle with S&P.  Toss to coat.  Take your diced butter and dot it over the top of the squash.  Put in oven to roast. I don't have an actual time on this - but it takes at least 30 minutes.  Every once in a while, open up the oven and stir it around to help it brown well and to distribute the melted butter.  It's done when the squash evenly mashes under a spoon, and it has some nice golden brown coloring to it.

While the squash is roasting,  take your diced onion and sauté it in a stock pot or dutch oven in a bit of EVOO and the remaining T of butter.  Season with S& P and cook until it is tender a bit caramelized. Turn off the heat as soon as it's done, and wait for your squash.

When the squash is done, remove it from the oven and add it directly to the pot with the onions.  Add in the entire box of chicken broth, and turn your stovetop on to medium heat.  Using a flat wooden spoon, mix well and scrape up all the caramelized goodness from the bottom of the pot.  Add the milk & water, and all of your spices.  Side note - if you aren't crazy about the taste of curry, still use it in this recipe.  It's a very small amount that adds complexity to the flavor profile and leaves your tastebuds wondering, "hmm... what was it that made this SO good?"

Caramelized onion goodness.
Bring the mixture to a low boil and let it cook for about 5 minutes.  Then, turn off the heat, and using an immersion blender, blend to a nice smooth consistency.  If you don't have an immersion blender, you can use a normal blender.  HOWEVER, it is VERY important that you never try to blend a hot liquid!  It will explode all over the place.  Trust me, I speak from experience (I was making pea soup and had scalding green goop all over the ceiling, cupboards, counter, floor, and myself, not fun!!). If you are going to use a traditional blender, let the mixture cool to room temperature before blending, then reheat prior to serving. Taste for seasoning and adjust if necessary.

I like to serve with a small dollop of nonfat greek yogurt to add a bit more creaminess, as well as a sprinkle of cayenne for a little more spice.  You could also sprinkle with some fresh chopped chives and chopped toasted cashew. Or a dollop of créme fraiche. Or whatever you feel like.   It's nice to have some nice crusty bread on the side for dipping.  Enjoy!

Thursday, October 7, 2010

Super Delicious Canapés

This is an appetizer recipe that my family has been making for at least 40 years, and has become a staple at most family get togethers. Without a doubt, whenever anyone tries it, they love it, and ask what's in it!  I sort of hate to tell them, because it's soooo bad for you, but if you just have a couple pieces, that's not so bad, right?  Also, if you say that you don't like crab, you'll still like this.  As a kid, I hated crab, but still gobbled these down.

Last but not least, these are great when made ahead of time, which certainly helps make entertaining easier.  The wedges keep super well once frozen - just toss them in a ziploc freezer bag until you're ready to cook them.

Crabmeat & Cheese Canapés
Ingredients:
1 can crabmeat, regular size
1 jar Kraft brand Old English Cheese Spread
1 stick butter, softened
1 1/2 tsp mayonnaise
1/4 tsp garlic powder
1/4 tsp salt
Pinch of cayenne (optional, if you like a bit of spice, use it)
6 Thomas' brand English Muffins,  split

Directions:
The canapés - post-freeze, pre-broil.
Combine all the ingredients (except english muffins) and mix till thoroughly combined.  It's super important that your butter is completely softened, or it won't blend into the other ingredients.  Spread over the english muffin halves, and then place on a cookie sheet.  Cover with plastic wrap. Place in freezer and freeze thoroughly.  Once frozen, cut each half like a pizza into 6 wedges.

At this point you can either freeze the wedges in ziploc bag until ready to serve, or you can cook them now.  To cook, place under broiler and let cook until nice and browned on top.  Serve immediately.  And try not to eat the whole batch :)

Easy Pesto Pizza

Easy Pesto Pizza with Spinach Salad
I'm so behind on blogging!  Last week, the hubby and I celebrated both of our birthdays (27 for me, 30 for him), we had family in town, and a BIG 30th bday party on Saturday.... so I'm finally getting back to the blog.

I had a club meeting tonight and I needed a quick fix for dinner, so I came up with this recipe.  It's a super easy one that tastes like you spent more time on it than you really did.  The big time savers are the store-bought pizza dough and the store bought pesto sauce.  By all means, if you have time to do homemade versions of these things, do!  But if you're in a pinch for time, use these shortcuts and  you can whip this up in just a few minutes -  it cooks very quickly too. 

Ingredients:
  • Frozen Pizza Dough, thawed
  • EVOO
  • Store-bought Pesto
  • Shredded Mozzarella Cheese
  • Grape Tomatoes
  • Chopped Cooked Chicken Breast
  • Torn Basil
  • Shredded Parmesan
  • Hot Pepper Flakes
Directions:
Spread with Pesto
Preheat oven to 385 degrees.  Take your store bought pizza dough, and roll it out/stretch it out to fit a cookie sheet.  I find making square pizza is a bit easier.  Brush the dough with EVOO, and par-bake until it just starts to puff up, approximately 3-5 minutes, then remove.

Take a spoon and spread the pesto sauce all over the crust.  You won't use as much pesto sauce as you would a red sauce, but make sure you have good coverage because the pesto packs a lot of the flavor!

ready for the oven
Next, top with shredded mozzarella cheese.  I like to use Sargento brand low fat cheese, and I find that one standard size bag is the perfect amount for one pizza.  Then, cover with sliced grape tomatoes (slicing them might seem a little labor intensive, but it really only takes a few minutes - if you want, just halve them... whole ones roll off too easily). Next, add your chopped chicken breast.  I had leftover grilled chicken, so I just used that.  Finally, top with some torn basil leaves, shredded parmesan cheese, and a sprinkle of hot pepper flakes (if you like spice).

Put the pizza in the oven, directly onto the center rack, this let's the crust get all nice & crispy. Cook until the cheese is bubbly and the crust is nice and golden brown.  Let cool on a cookie sheet for a few minutes, then slice & serve.  Enjoy!


Friday, September 24, 2010

My Favorite Cooking Gadgets, Part 1

Gadget #1: My Apron
Okay, so calling an Apron a gadget is probably quite the stretch, but a good Apron is such a great companion to any meal you are cooking.  You save your nice clothes, have a very quick hand wipe station right on you, and they instantly make you feel very "chef-y."

Anthropolgie - cute cute cute.
Growing up, my mom ALWAYS wore an apron while cooking - in fact, my mom in an apron is one of the most indelible images from my childhood. She started with the very basic white chef apron, but with the help of countless Mother's Days, has grown quite a collection of really fun aprons.

You might feel kind of marm-ish thinking about wearing an apron - DON'T!  These days you can find the cutest aprons all over the place - Williams Sonoma & Anthropolgie always have adorable ones.  And ladies,  what husband wouldn't want to come home to his wife, in super hot heels, cooking him dinner in an apron and well... perhaps something more, perhaps not.

Gentleman - nothing says "I'm comfortable with my masculinity" like an apron does.  I just love it when I show up at a friends house for dinner and the dude is rocking an apron.  He gets immediate respect - this guy doesn't dabble in the kitchen, he can cook!

For the parents out there, there are COUNTLESS reasons to get your kids involved in cooking meals (I'll elaborate on that someday) and giving them their very own apron really makes helping mom and/or dad out in the kitchen a bajillion times more fun.  It's like dress up, but better - because you get to cook too.

Gadget #2: Silicone Spatulas
I got my first silicone spatulas about 6 years ago - I still have them, and they are in great shape. I use them pretty much every time I cook, and they clean up perfectly in the dishwasher.  Silicone is a pretty amazing thing, here's Wikipedia's explanation of Silicone:

"Silicones are inert, synthetic compounds with a wide variety of forms and uses. Typically heat-resistant and rubber-like, they are commonly used in cookware...(and other stuff like fake boobies)...Silicones are polymers that include silicon together with carbonhydrogenoxygen, and sometimes other chemical elements."
Silicone Spatula: Must-Have Tool!

So enough for the science speak - what's amazing about silicone tools is that they can withstand SUPER hot temperatures (like 675 degrees fahrenheit).  I use my silicone spatulas all the time.  They're perfect for scrambling eggs, sautéing anything, and also work just like a rubber-spatula for your non-heat cooking tasks. 


These days, you can find silicone tools pretty much everywhere that sells cooking supplies. You can also find silicone muffin pans, bread pans, pot holders, and (next on my list) basting brushes.  And because they're a synthetic material, you can get them in all sorts of fun colors.  What's not to love?